
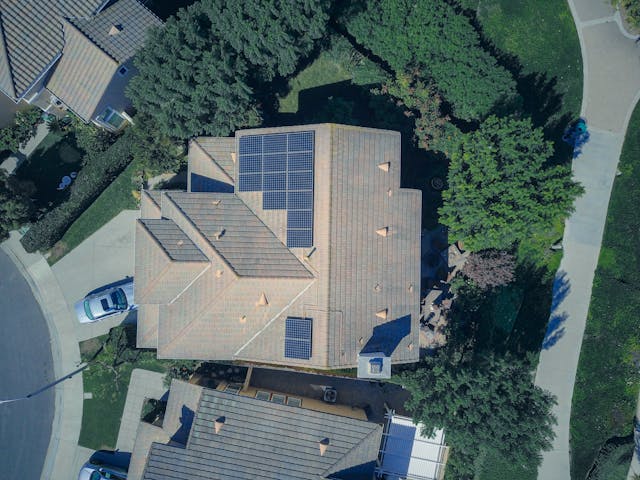
Solar energy is no longer a fringe option; it’s a critical component of the modern, efficient home. As power costs rise and environmental concerns mount, more homeowners are realizing that harnessing the sun is simply a smart financial move. But for your solar system to deliver maximum efficiency and longevity, the preparation must begin long before the first panel is mounted. The key to success is designing a solar-ready roof that works with the panels, not against them.
If you are planning a roof replacement or new construction, this is your crucial window of opportunity. Taking proactive steps now prevents costly rework later, maintains the integrity of your roof’s waterproofing, and ensures your system achieves maximum power output for its 25+ year lifespan. Finding a local contractor experienced in both high-quality roofing and solar readiness is essential, as the two systems must be perfectly aligned. Your house will need to be structurally sound and waterproofed before you install your solar panels for your home.
Here are the four foundational principles for designing a roof that is optimized for seamless, long-term solar integration.
1. Structural Strength and Load Capacity
The single most critical factor is ensuring your roof can handle the added weight for decades to come. Solar panels, racking systems, wiring, and hardware add a dead load of between 3 and 6 pounds per square foot (PSF). This doesn’t sound like much, but when you factor in snow and wind loads—especially in severe weather zones—the total stress on your rafters and trusses is significant.
- Engineering Assessment: Before any installation, a professional structural assessment must verify the current load-bearing capacity of your roof structure. Older homes, in particular, may require reinforcement to meet modern building codes that specifically account for solar installations.
- The Age Factor: Solar panels are warranted to last 25 years or more. If your existing roof is already 10 to 15 years old, it makes little sense to install a long-life solar system on a short-life asphalt shingle roof. The ideal scenario is to install the solar system on a brand-new roof so the lifecycles of both systems align. Reroofing after solar installation is complex and often expensive, as the panels must be safely removed and reinstalled.
2. Optimal Orientation and Shading Mitigation
The placement of your panels dictates their power output. A truly solar-ready roof minimizes obstructions and maximizes sun exposure.
- South-Facing is Best (Usually): In the Northern Hemisphere, a south-facing roof slope is ideal for capturing the most sunlight throughout the day. However, depending on your energy usage patterns, an East-West orientation can be beneficial, capturing morning and evening sun when household electricity demand often peaks.
- Ideal Slope: Generally, an optimal roof pitch for solar is close to your geographical latitude, allowing the panels to catch the sun perpendicular to its path year-round. This is typically between a 4:12 and 5:12 pitch for many U.S. locations.
- Clustering Obstructions: During the design phase, purposefully cluster all non-solar equipment (chimneys, vent pipes, skylights, satellite dishes, dormers) onto the North-facing slope or near the ridges. Keeping the optimal South/East/West-facing planes clear maximizes usable space and simplifies the eventual panel layout.
- Shading Analysis: Account for shading from mature trees or neighboring buildings during the peak production hours (9 AM to 3 PM). Pruning trees or careful placement of panels using microinverters can mitigate shading losses.
3. Material Choice and Waterproofing Integrity
The type of roofing material you choose can dramatically affect the ease, cost, and long-term waterproof integrity of the solar installation.
- Metal Standing Seam: This is arguably the best material for solar. Clamps can attach directly to the raised seams without the need to drill holes into the roof deck. This method completely preserves the roof’s waterproofing, eliminates dozens of potential leak points, and aligns perfectly with the longevity of solar panels.
- Asphalt Shingles: This is the most common surface. Installation requires penetrating the shingles and decking to anchor the racking into the rafters. Crucially, the installer must use high-quality flashing (metal plates) and sealant at every single penetration point to maintain the warranty and prevent leaks. Never rely on sealant alone; flashing is the current code requirement.
- Flat Roofs: Flat roofs often require a ballasted system where the panels are held down by weight (ballast blocks) rather than penetrations. This requires a structural assessment to handle the increased load, but minimizes roof penetrations.
4. Planning for Electrical and Safety Access
Seamless integration involves more than just the roof surface; it includes the necessary pathways for wiring and access.
- Conduit Pathways: Pre-plan the location of the conduit runs—the tubes that protect the electrical wiring—from the panels to the inverter and then to the main electrical panel. Designing these pathways to run through the attic or along less visible fascia lines will enhance the aesthetic appeal of the final system. Ensure your main electrical panel has the capacity for the new solar breaker.
- Fire Code Setbacks: Local building codes and fire safety regulations often mandate setback distances (usually three feet) from the edges of the roof, valleys, and ridges. This ensures clear pathways for firefighters. Design your solar array layout to respect these no-build zones from the start.
By prioritizing these four design principles, you are not just getting a new roof; you are investing in a clean energy power plant that will operate efficiently, safely, and seamlessly for the next quarter century.


 WebProNews is an iEntry Publication